React: Zero to hero
We have the perfect article for you if you're new to react. My React Series starts with this chapter. This article will cover the basics required.
Introduction 🤭
Hey Guys, It's Gulshan again with another article.
In this article, we will be going through some basics of react and its file structure.
It is the chapter 1 of my react series. I hope you'll love to learn by following my articles.
Why would you use react? 🤔
- It structures the "view" layer of your application
- You can reuse the components you wrote.
- Uses JSX
- One can build interactive UIs with virtual DOM
If you aren't familiar with these words JSX, DOM, etc.
Don't worry, I'll explain them.
Please wait until I write an article on DOM or head over to MDN DOCS.
What are the prerequisites? 😳
- Basic HTML, CSS and JavaScript
Some of the core JavaScript concepts required are,
- Understanding of DOM
- Data types and all those basic things
- Promises and asynchronous programming
- Array Methods like forEach() and Map()
- How to make an HTTP request.
Note:
These aren't compulsory if you have previous experience in some programming language. You can relate those stuff with my upcoming blogs on react and Vanilla JavaScript.
What we will cover? 🧐
- We will understand the file structure of our react application.
- We will also have a look at JSX, which seems a bit daunting.
- But I got you covered.
I'll walk you through the basics of JSX, And will try my best to make you comfortable using JSX in react.
For those who don't know what JSX is?
- Well, JSX is the templating language for react. It is an extension of JavaScript and is like a templating language but with the powers of JavaScript.
Tip:
Learning JSX will make you a better JavaScript developer.
Ready to learn?
Let's get started,🔥
We need a react project.
For that, head over to your terminals and create a react app by,
npx create-react-app my-app
It will create a react application with typescript files instead of JavaScript files.
- For those who don't have Node Js installed.
Head over to Nodejs site and install it. And re-run the above command to create a react app.
After the above procedure, you will have a project file structure like this,
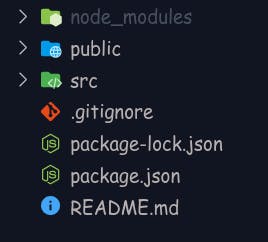
Now run,
npm start for running our react app.
Here's how it will look like,
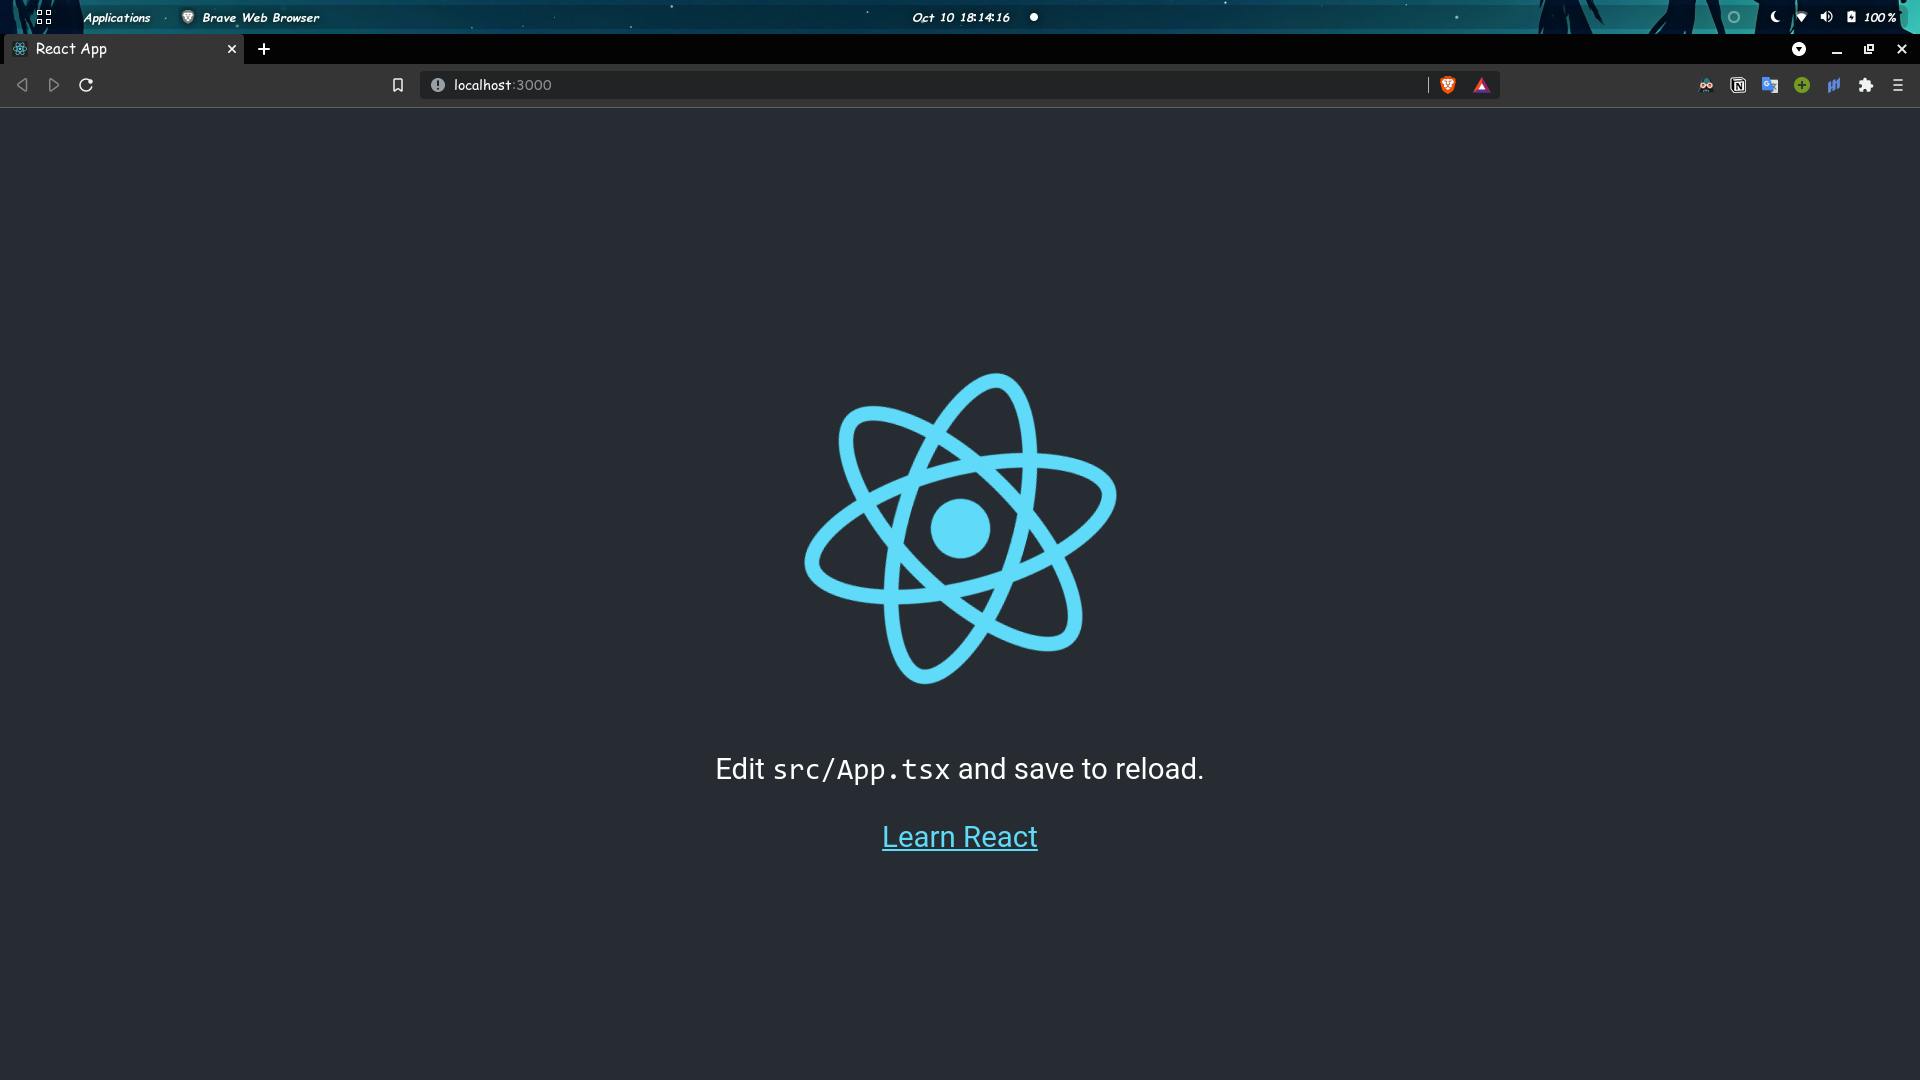
Let's understand the file structure of our react application.
- The
package.jsonfile has the list of dependencies required.These are used by your react application
The
package-lock.jsonfile has the version and other details of installed packages.Open the
publicfolder. This folder is a kind of gateway to our application. Right now, we don't have to deal with this folder.
Umm, I want you to open the index.html file inside the public folder which you opened.
On line number 31, you see there's a div tag with id root
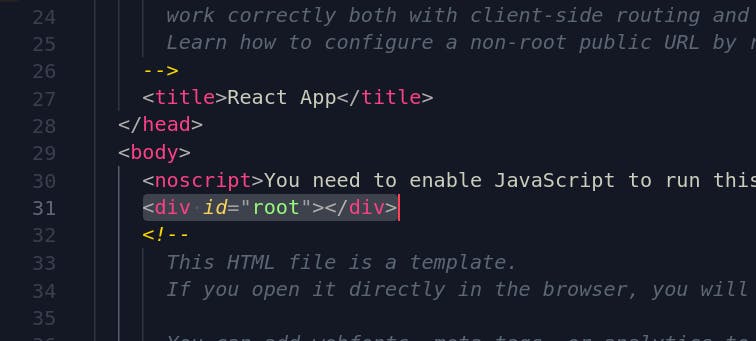
In another folder named src, you'll find an index.js file.
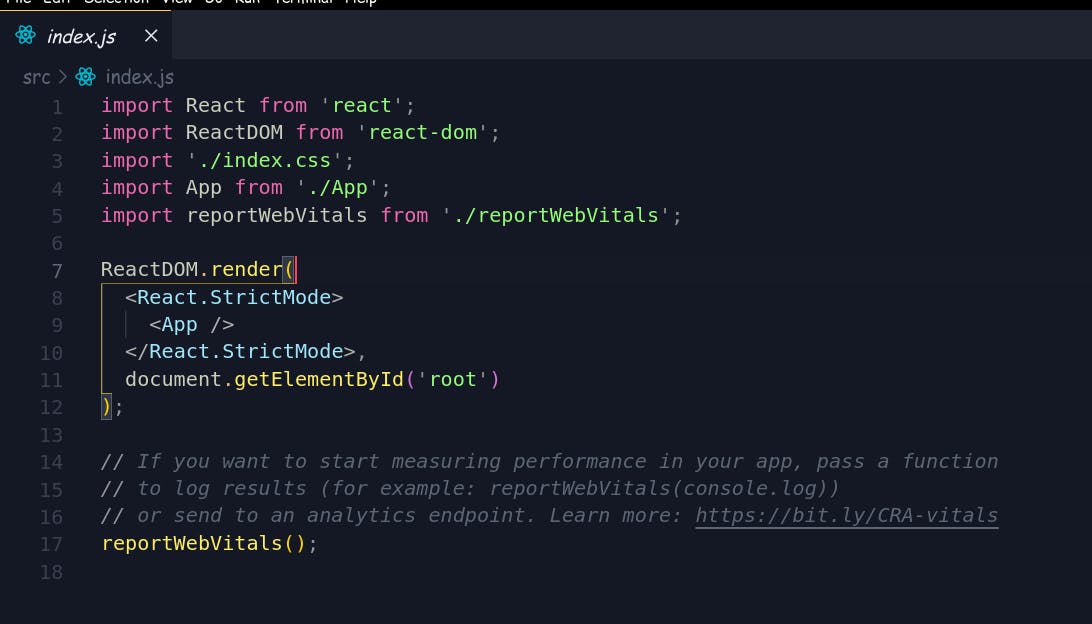 on line number 11, it says to get the element in the document ( i.e. our
 public/index.html ) with id root and run this script on it.
In our case, it is inserting our app into that div.
Where's the code of the app?
You will find the code of our current application inside the app.js file of the current directory.
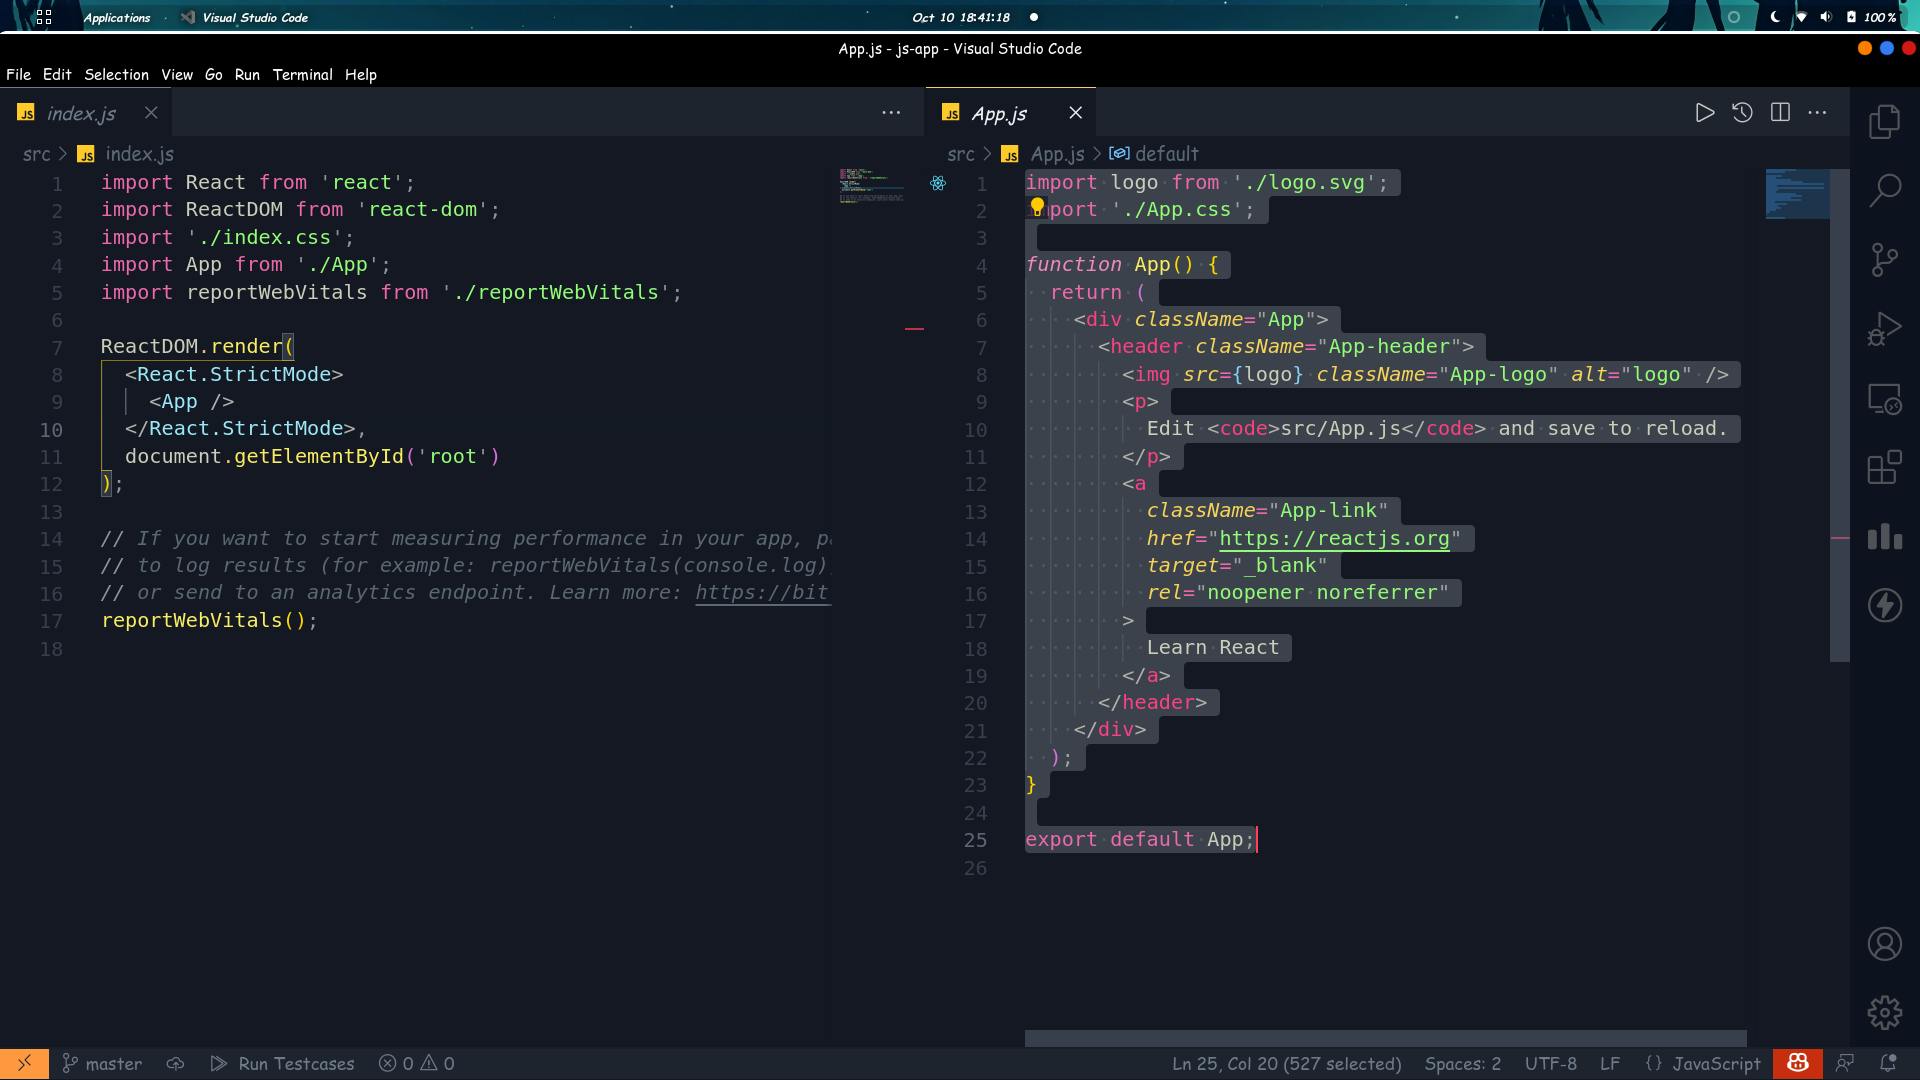
You see, this file is imported into the index.js file using import App from './App';.
And its function App is called in the index file.
Now we have learned about the file structure and how this react app works.
Let's open the public/index.html to customize the title of our application.
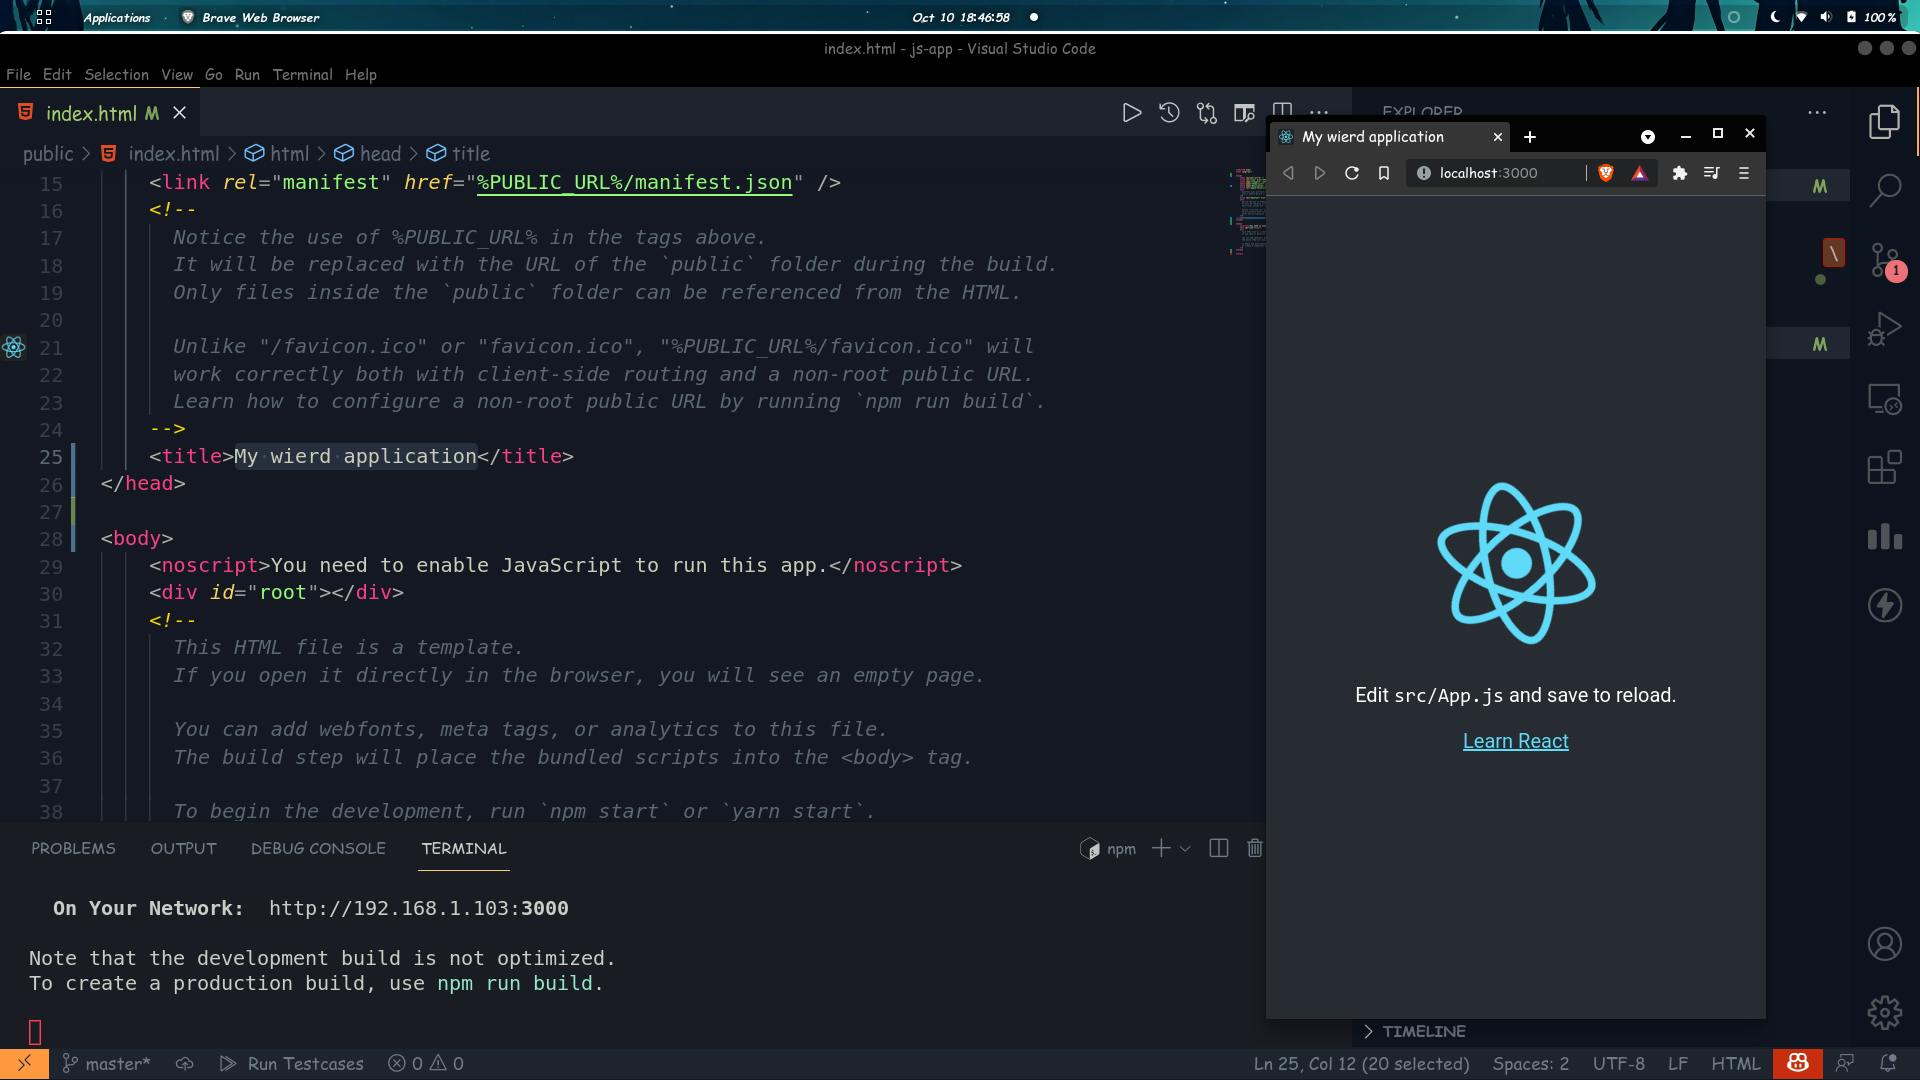
While working with react, you don't have to save your file and restart the server to check the changes.
The NPM engine does that for you.
After all,
Let's answer some important questions,
What does it mean? 😶
If you're here, you have an idea about what is react. But then also in simple terms,
- React is a library for building User interfaces.
- React runs on the client browser as a SPA(Single Page Application).
By the way, what is SPA? What does it mean?
For example, check
youtube.comWhen you open that site on your desktop, it will load once. Then whatever you do with youtube, you won't see a loading indicator on the tab section of your browser.
Now open the src/App.js and check what's happening under the hood.
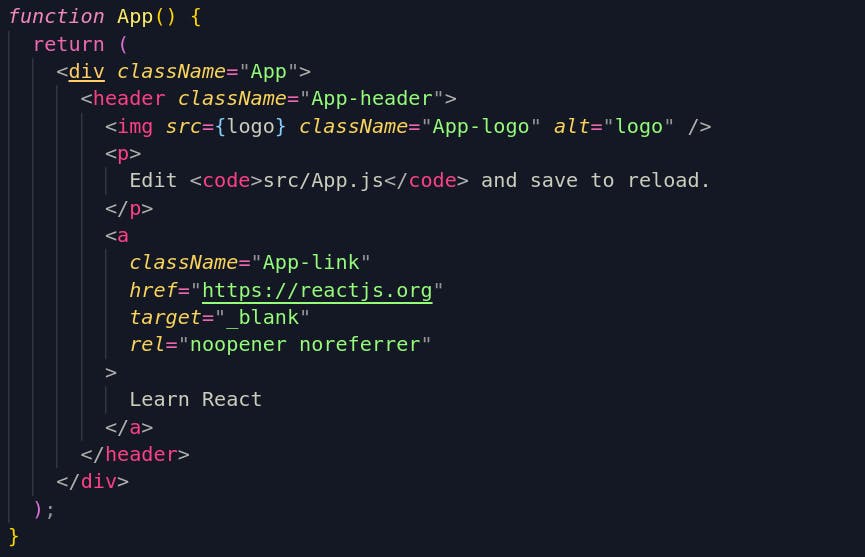 Looking at the code, it looks like the function
 App returns an HTML component. But it's not.
It looks like HTML. But when you check, you will find that HTML tags have the class attribute named className not class.
This is JSX, not our good old HTML 🥺.
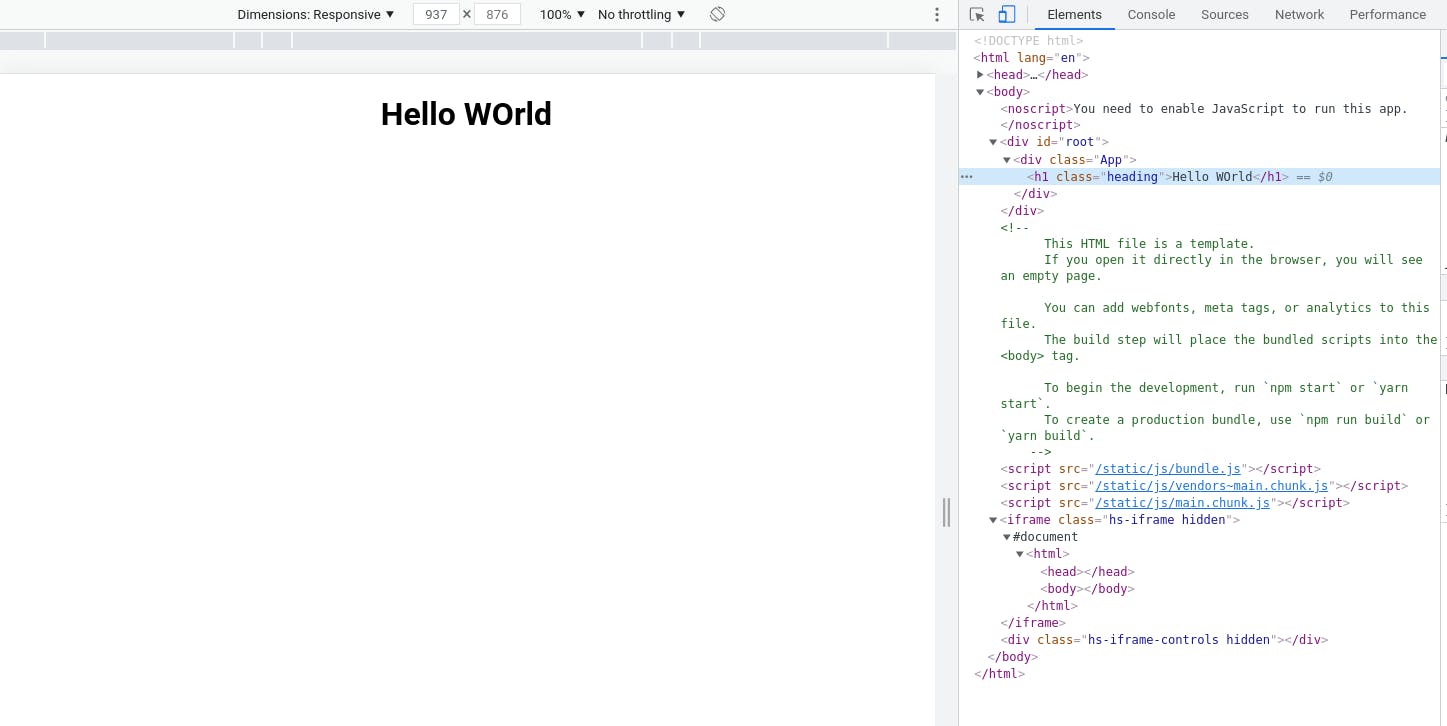
Now replace the code inside the src/app.js with the code shown in the image below,
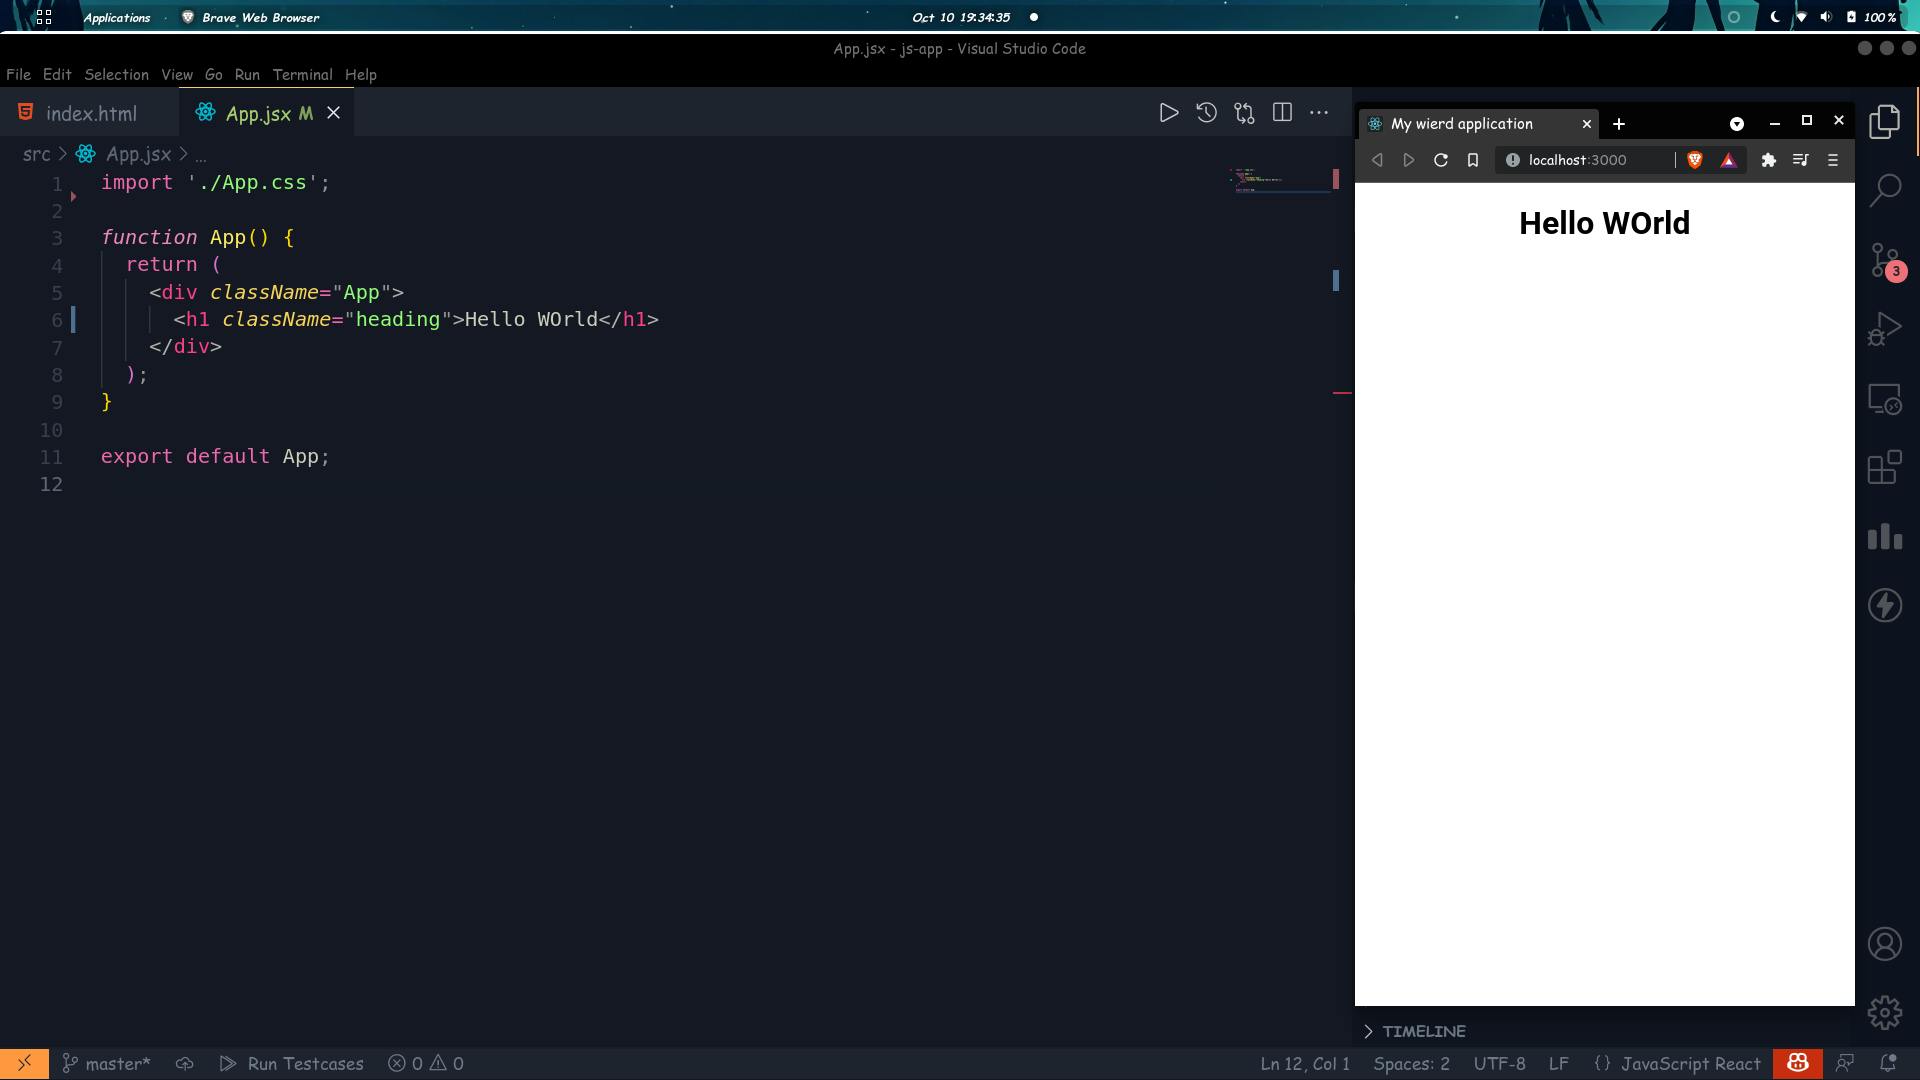
I want to show you something, press f12 or ctrl + shift + I on your keyboard,
You see, the website content has the boilerplate which we saw in file public/index.html and our hello WOrld between our div tag of id root.
Okay, What else can we do with react? 😁
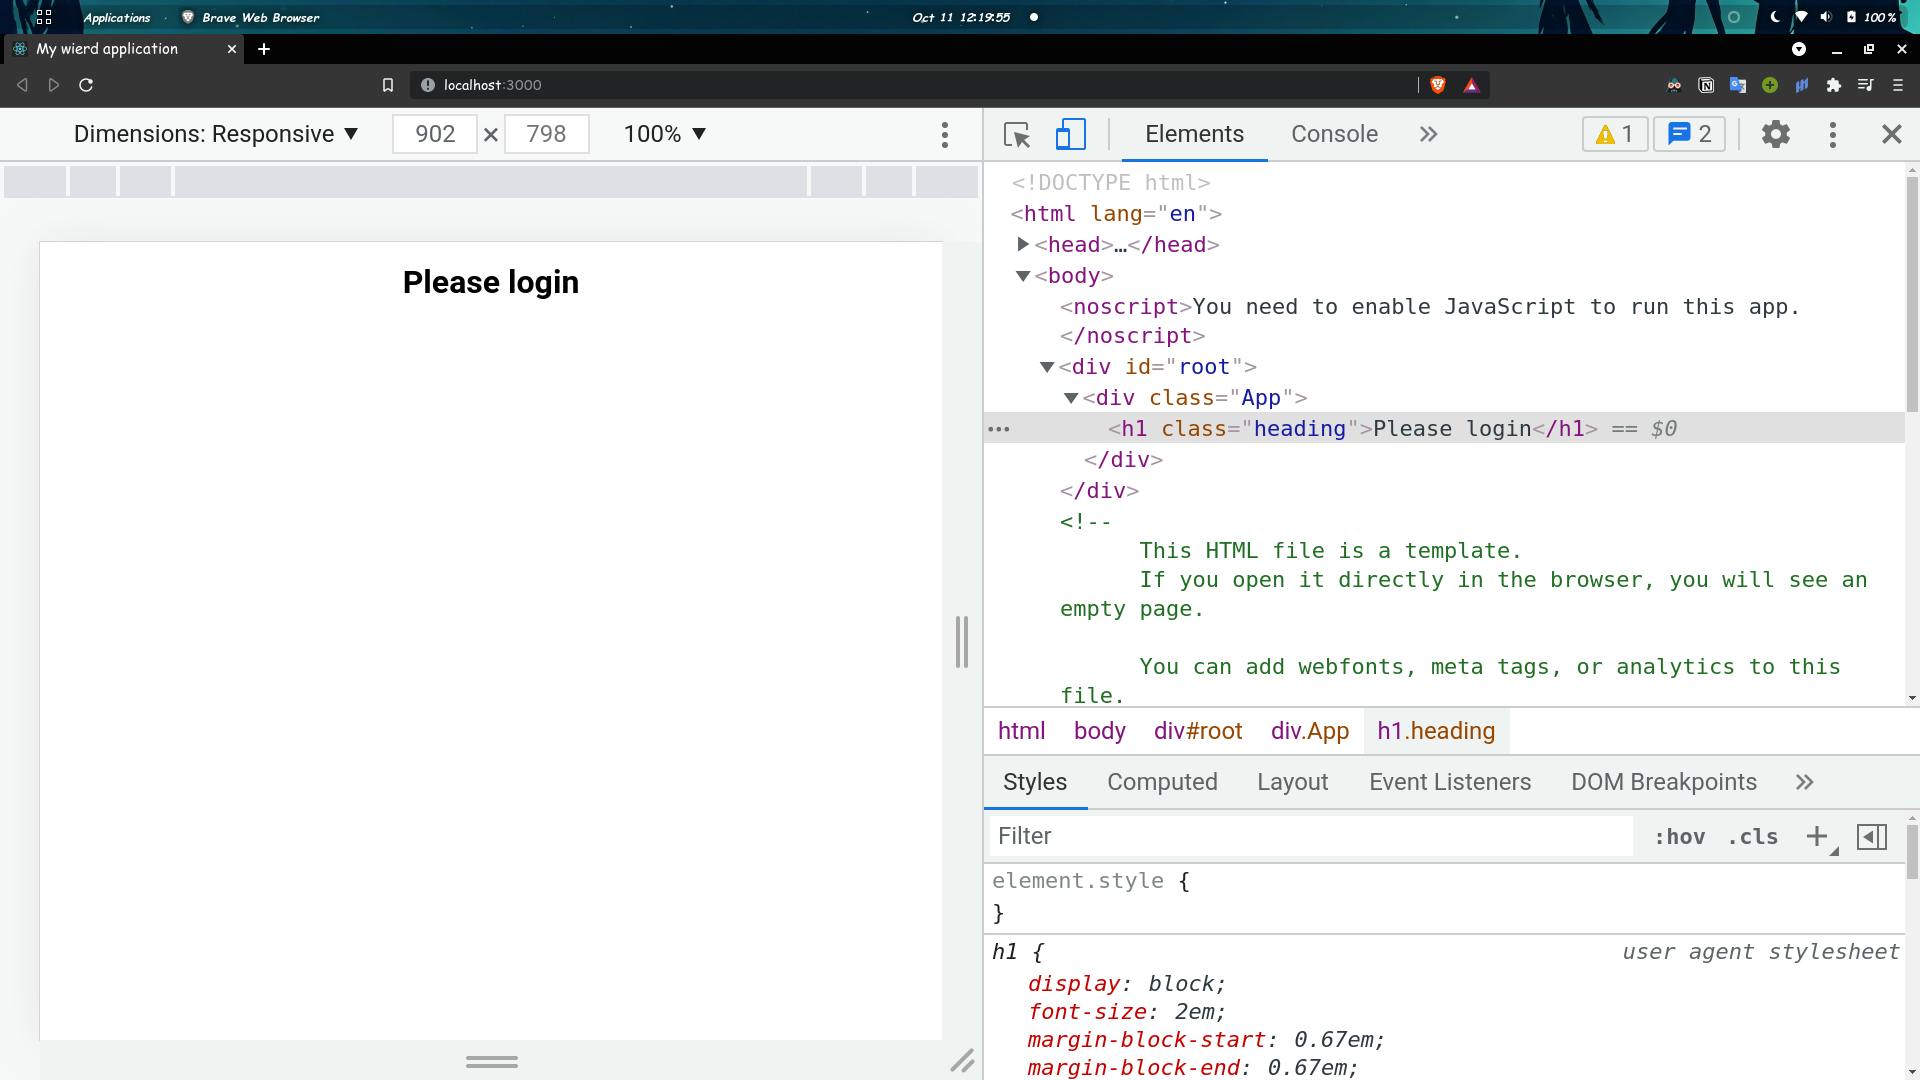
As we are writing JSX code, we can use javascript inside our HTML body ( can say, for now )
Something like,
import './App.css';

function App() {
  const username = "Gulshan";
  const isConfirmed = false;
  return (
    <div className="App">
      <h1 className="heading">{isConfirmed ? "Hello" + username : "Please login"}</h1>
    </div>
  );
}

export default App;
Here in this code, I have used the ternary operator for writing this conditional element.
It is one of the advantages of react.
Let's build our component in react.😈
Head over to your src folder and create another folder named components. Here we will store our various JSX component files.
 Ohh, by the way, you can have a JSX or js extension of your file. It won't make much difference, but it will allow your code editor to identify that this file is a react file. And this will help your editor to provide suggestions and formatting of code.
Else you have to tell your code editor, "Hey, this is a react file." which we don't want to do.
Suggestion 🤓:
If you're using VS CODE like me. Install the
ES7 React/Redux/GraphQL/React-Native snippetsextension. It will help you a lot and we will use it in the later section of this article.
Now open our src/components/header.jsx file. Type rafce, It will create the boilerplate for our component.
import React from 'react'

const Header = () => {
    return (
        <div>

        </div>
    )
}

export default Header
Replace the div element with Header in this file and add the title inside it.
import React from 'react'

const Header = () => {
    return (
        <header>
            <h1>Todo tracker</h1>
        </header>
    )
}

export default Header
Press ctrl+s to save the changes, but there are no changes. Why?
You're supposed to import the required file into the main file.
In our case, the main file is App.jsx or App.js.
How to import our components?
import Header from './components/Header';
And now we have to embed it inside our code,
<Header />
Add this line between our div.
index.jsx
import Header from './components/Header';
import './App.css';
function App() {
  return (
    <div className="App">
      <Header />
    </div>
  );
}

export default App;
And now save the code, and you can see the changes.
How to use the components in react like a function? Or how to pass arguments? 🥶🧐
<Header title="Gulshan" />Yeah that's it. But hey how our header component will handle this argument?
src/components/header.jsx
const Header = (argument) => {
    return (
        <header>
            <h1>Hello {argument.title}</h1>
        </header>
    )
}

export default Header
Write any word within the parenthesis and use it inside of your component.
Hey, wait, what If I missed to pass any value? 🤪
It will show nothing in the place of our component, or certain sections of our component will be empty.
So for tackling this, we have defaultProps.
Header.defaultProps = {
    title: "My title"
}
Add this at the end of your code inside the header.jsx file before that export .... line.
It will provide your component with a default property. That can be used when you didn't pass any value while using it.
What if you want some type safety?
Type safety means a compiler will confirm the types such as
int,string,etcWhile compiling your code. And it will throw an error if you tried to assign a variable with the value of wrong type.This is achieved using
propTypesin JS.How to use it?
>
// Add this line below your code above the export stuff.
Header.propTypes = {
    title: PropTypes.string
}
- This will ensure that you're passing a string or a variable of type
String.- You can add
.isRequiredafter the string key to ensure that your code is null safe.But how is this going to ensure that my code is bug-free?
We will receive an error message in the console tab of a browser if our rule/property does not meet the conditions.

If you don't want to define such properties, then you can use
TypeScript. We will talk about this extension of JS in our later article.
How to use CSS inside our JSX component as our attribute?
Here's an example of it,
// argument is props, but I just used this as an example.
const Header = (argument) => {
    return (
        <header>
            <h1 style={{
                color: 'blue',
            }}>{argument.title}</h1>
        </header>
    )
}
You have to write your CSS code inside the two curly braces.
But we aren't done yet!
Since we are using our typical JS code. We can declare our style inside a variable and use it as the value of the
styleattribute.
Example:
import PropTypes from 'prop-types'

const Header = (argument) => {
    return (
        <header>
            <h1 style={HeaderStyle}>{argument.title}</h1>
        </header>
    )
}

const HeaderStyle = {
    color: 'red',
}
Header.defaultProps = {
    title: "My Title"
}

Header.propTypes = {
    title: PropTypes.string.isRequired
}

export default Header
But we won't be doing this kind of stuff.
Else, we will be using the index.css file for working with CSS in our React Application.
Hmm, Looks like we're clear with the basics required. If any exists I'll cover it in my future article.
Until then,
Happy Coding😊.
if (youLikedThisArticle) {
    console.log('Please smash the reaction buttons above.😊')
} else {
 throw('Please write a comment below stating the issue. This would help me writing good articles for you. 😊');
}

